AFO 424 - Stocktaking
424.1 Introduction
Using this AFO you can take inventory of the entire collection or parts thereof. This process consists of several steps, some of which are carried out outside of the Vubis system.
The functionality is based on the use of a handheld scanner for checking (RFID)tagged material. Such a scanner might have the following characteristics:
· The hand-held stock management reader is designed to allow staff to read smart label-equipped items (books, DVDs and CDs), whilst stored on the shelf, and process the information from the label to provide a full inventory or help to locate items.
· The reader features a large flexible antenna that is designed to flex around the books as it is moved down the shelf edge, providing maximum reading capability. Information relating to the current task is displayed using a large touch screen interface, with notifications provided optionally via audible alerts, LED light, vibration or a combination of all three.
· The reader is equipped with the following functionality:
Search and seek:
The reader can be used to search for a particular item on a shelf using a variety of criteria. For example, items that have not been loaned within a given period, exact book titles, search by author, etc.
Shelf tidying and cataloguing:
By downloading zone information to the reader, it can be configured to report on items that are out of place, allowing an operator to immediately remove the items and re-shelf.
Item inventory:
For stock counting and inventory purposes, the reader can be configured to simply read all item identification numbers and store as a list for downloading. This function provides the operator with a complete inventory of all items.
Connectivity:
The power of the hand-held comes from the unique way in which it interfaces with existing Library Management Systems (in this case V-smart) using standard protocols, allowing particular search patterns to be generated automatically and without duplication of information.
The two main functions related to the Vubis system are:
Find items on the shelf:
You can export data from with a specific savelist command from the following AFO's: 418, 423, 462 (Circulating stock lists). This savelist can then be fed into the scanner for comparison with the shelves. E.g. a picklist from AFO 418 to retrieve reserved items or to find items that are required for circulating stock via AFO 462 - Items to be sent.
Make an inventory of items on the shelf:
The second purpose is to use the scanner to read all the items on the shelf to create a savelist/file of everything that is on there. This file can be fed back into the system in AFO 424.
424.2 Setup for finding items
The export file will be generated from the following AFO's via the option Export savelists:
· AFO 418 - Picklist Views
· AFO 423 - Item details
· AFO 462 - Circulating Stock - Lists of items to be sent
· AFO 462 - Circulating Stock - Lists of items to be received
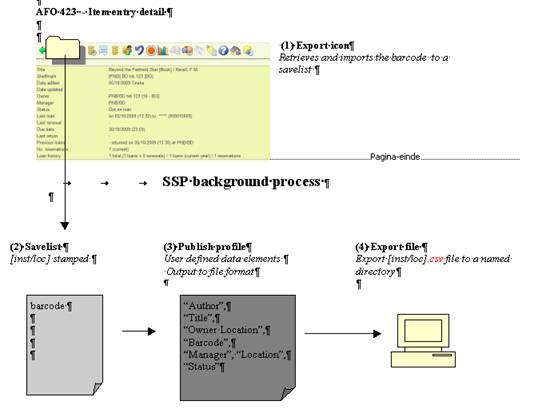
The export file name is made up of user login [institution/location] [date stamped - optional] and uses the data elements in the SSP publish profile.
The export file is a comma delimited *.csv file with data surrounded by quotes.
The export file is based on a specific publication profile defined in AFO 141. This may contain for example, the fields Author, Title, Owner Location, Barcode, Manager Location, Status.
Only one publish profile is supported. This profile must be available under "General use"
There are two parameters, one related to the location of the export file, the other to the publish profile defined in AFO 481 – Miscellaneous – Handheld scanner parameters.
V-smart file export workflow
(example based on AFO 423, principle is the same for other AFO's)
424.3 Workflow for inventory check
Once you have created a file with the handheld scanner containing information on (parts of) the collection that were found on the shelves, you can import this via AFO 424. When you start this AFO a summary screen is displayed, that looks similar to the Savelist screen in AFO 141:

Options on the screen
: With this option a new savelist can be created for application Items. An input form will be displayed:
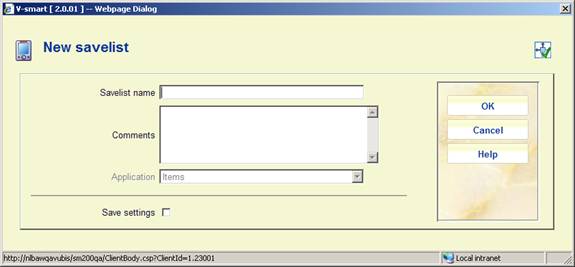
After you have added the required information you need to add items to this list. See section 424.3.1.
: Select a line and then this option to view the items in the savelist. See section 424.3.1.
: Select a line and then this option to delete the selected list. The system prompts for confirmation.
: Select a line and then this option to import lists created with the scanner. See section 424.3.2.
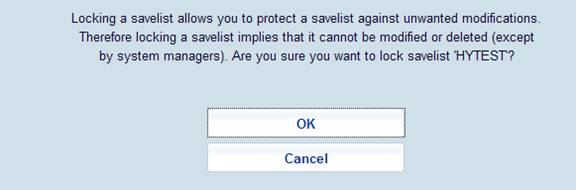
: Select a line and then this option to indicate that a list is complete. The system will display a warning:
: Select a line and then this option to unlock a previously locked list. The system prompts for confirmation.
: Select a line and then this option to compare the contents of the list with records in the database. See section 424.4.
: Select a line and then this option to change the properties of the list. See section 424.3.3.
: Use this option to update the information displayed on screen. This is to allow a refresh on the progress when processing a large number of items.
: Use this option to sort the information displayed on screen. See section 424.3.4.
: Use this option to filter the information displayed on screen. See section 424.3.5.
424.3.1 Modify list
When you select the option for a particular line a summary screen will be displayed:

Options on the screen
: With this option you can add new items to the list. This can only be done for lists that are not locked. An input form will be displayed where you can enter item barcodes.
: Select a line and then this option to view the details of the selected item (screen similar to that of AFO 423).
: Select one or more lines and then this option to delete the selected item(s). The system will prompt for confirmation.
: Use this option to import lists created with the scanner. See section 424.3.2.
: Use this option to indicate that the list is complete. The system will display a warning.
: Use option to unlock the currently locked list. The system prompts for confirmation.
: Use this option to compare the contents of the list with records in the database. See section 424.4.
: Use this option to change the properties of the list. See section 424.3.3.
: For large lists only the first 60 records are initially displayed. Use this option to retrieve and view ALL records in the list.
: Use this option to filter display on record number. You can truncate, so 2.10 will retrieve only records which are in the 2.10, 2.10x, 2.10xx, 2.10xxx range.
424.3.2 Import items from file
: Select a line and then this option to import lists created with the scanner. An input form will be displayed:
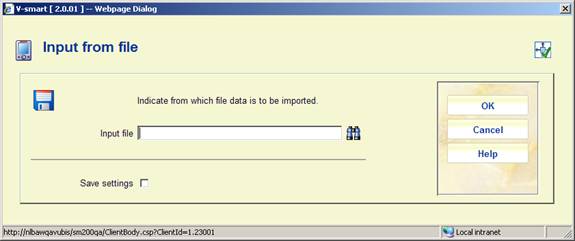
Enter the full path and filename or use the button to retrieve the correct file and click . The system will now add the items from the file to the selected list.
Notes
If you use this option from the detail screen of a particular list, the items will be added to the current list.
You can only use this option for lists that are NOT locked.
424.3.3 Change properties
: Select a line and then this option to change the properties of the list. A form will be displayed:
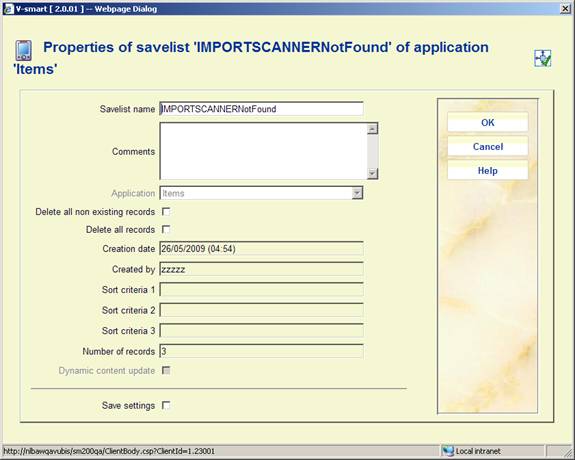
You can modify the Savelist name and/or add Comments.
Delete all non existing records: when you check this option the system will remove any item records from the savelist for which the title or bib record cannot be found.
Delete all records: when you check this option the system will delete all record whether or not the records (bib)can be found. The savelist itself will remain (empty).
Notes
If you use this option from the detail screen of a particular list, the properties are for the current list.
You can only modify details for lists that are NOT locked. For locked lists all fields will be greyed out.
424.3.4 Sort
: Use this option to sort the information displayed on screen. An input form will be displayed:
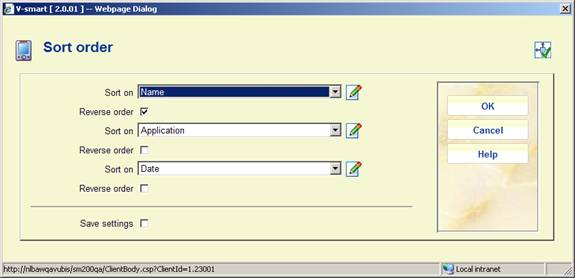
You can sort on Application, Comments, Date, Name and Size. Default sort is in ascending order you can optionally change to descending
424.3.5 Filter
: Use this option to filter the information displayed on screen. An input form will be displayed:
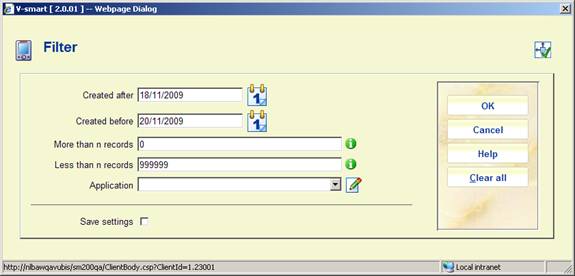
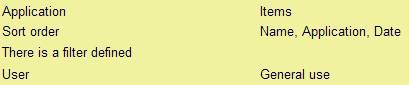
Select the criteria you wish to sort on. The header portion of the screen will denote a filter is in use:
Use the button to remove all filtering. The filter is NOT retained when you leave the AFO.
424.4 Compare with database
You can compare the contents of a list with information currently in the database. When you select this option for a particular list (either from the Defined import lists screen or from the Imported records screen) one or more messages will appear:

This initialization means the system clears out any existing sets.
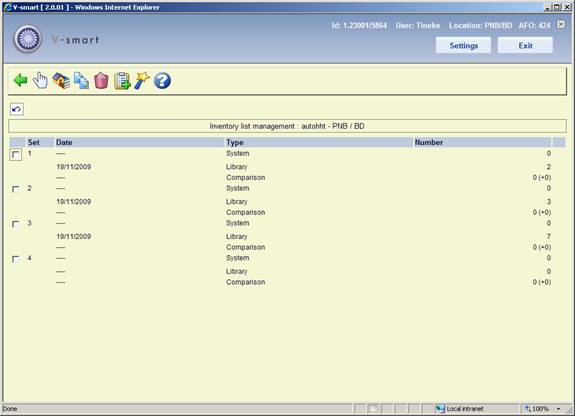
Columns on the screen
Set - this field contains the number of the set with the inventory and/or system list(s).
Date - this field displays the date on which the system list ('system') or the inventory list ('library') was compiled, or the date on which the comparison was performed.
Type - this field indicates the type of list.
Number - the number of items in the list is displayed here. With the type 'Comparison', the number of items in the system list that are not in the inventory list is displayed. The number of items indicates the major difference between the inventory and system lists. These are items that are not (or no longer) on the shelves for example because they may have been stolen. The number of items displayed between parentheses indicates other discrepancies.
Options on the screen
- select a set and then this option in order to view a set. See section 424.4.1.
– This option is the same as the option.
- select a set and then this option in order to initialise a set. The system will ask for confirmation.
- select this option to delete all sets and the inventory list. The system will ask for confirmation.
- select a set and then this option in order to compile an inventory or system list; an input screen will be displayed:

Fields on the screen
Copy items from savelist to system - enter the name of the savelist to be used as the 'system list' in this field. This savelist will contain the items that should be on the shelves according to the system.
Please note
The savelist must exist for your password.
Copy items in library from savelist - enter the name of the savelist to be used as the 'inventory list' in this field. This savelist contains the items that are actually on the shelves.
Please note
The savelist must exist for your password.
- Select a set and then this option in order to perform a comparison. When you select this option, an input screen will be displayed:

On this input screen, an existing sublocation code can be entered to allow the system to perform a check based on this. You can leave this field empty. Then the system will switch to the standard procedure for starting processes.
After the comparison has been done, the Comparison set will have entries. Select this set to view the details.
424.4.1 View a set
When you select the option in the overview screen for an inventory list, a overview screen will be displayed with a report concerning the comparison performed on the selected set.

Fields on the screen
Total number: system list - all items in the system list are displayed in this field.
Total number: inventory list - all items in the inventory list are displayed in this field.
System list: not in inventory list - the items that are in the system list but not in the inventory list are displayed in this field; possible reasons include: the items have been stolen, the items are in a different place on the shelves, the items were not been included in the inventory list (perhaps you forgot to scan them).
System list: not in catalogue any more - the items that are in the system list but no longer in the automated catalogue are listed here; this can only occur if the items have been deleted between the time that the system list was compiled and the comparison was performed.
System list: on loan - the items in the system list that are on loan are listed here. This list should normally be empty. If not, you probably did not exclude borrowed items when selecting the system list.
System list: reserved - the items in the system list that are included in reservation requests are listed here. This list should normally be empty. If not, you probably did not exclude items included in reservation requests when selecting the system list.
System list: special status (administration, exchange collection) - the items in the system list that have a special administrative status are displayed here (for example 'included in an exchange collection under construction').
System list: special status (lost, missing, claimed returned) - the items in the system list that have a special status as added via the status option in AFO 423 or 413 are displayed here (for example 'missing', 'lost', 'claimed returned' etc.).
Inventory list: not in catalogue (any more) - the items that are in the inventory list but no longer in the automated catalogue are listed here. This can only occur if the items have been deleted between the time that the inventory list was compiled and the comparison was performed.
Inventory list: on loan - this field indicates the items that are on the inventory list but that have the status 'borrowed' in the system. Items with this status should, of course, not be on the shelves and should be returned using AFO 412 so that they can be borrowed again.
Inventory list: reserved - this field indicates the items that are on the inventory list but which have the status 'reserved' in the system. These items should, of course, not be on the shelves but the action required depends on the exact reservation request status (available or not).
Inventory list: belongs to another institution - this field indicates the items that belong to the collection of a different institution.
Inventory list: belongs to another location - this field indicates the items that belong to the collection of a different location.
Inventory list: belongs to another sublocation - this field indicates the items that belong to a sublocation other than that entered when the comparison between the inventory and system lists was performed.
Inventory list: other status - this field indicates the items that are in the inventory list but not in the system list, and that do not belong in categories 8 to 13.
Inventory list: claimed returned - this field indicates the items that are in the inventory list and have a special status (as added via the status option in AFO 423 or 413) of 'claimed returned'.
Inventory list: lost or missing - this field indicates the items that are in the inventory list and have a special status (as added via the status option in AFO 423 or 413) of 'lost' or 'missing'.
Inventory list: other special status - this field indicates the items that are in the inventory list and have any other special status as added via the status option in AFO 423 or 413.
Options on the screen
- select a list and then this option to view the items in the list. If you select this option, a overview screen will be displayed. The system will display the barcode, part of the title and the shelfmark of all the items. Using the option on this screen, you can view the current status of a selected item. If you select this option, the system will switch through to AFO 423 ('Edit items'). Read the section on this AFO for more information.
- select a list and then this option to print the items in the list. The system will switch to the standard output procedure.
- select a list and then this option to include the items from this list in a savelist. If you select this option, an input screen will be displayed. Enter a savelist (or select a savelist from the list of existing savelists) and if desired, a comment.